Activating Upload Form PageActivating upload form page using PowerFolder.config can be done by adding the following configuration entry:
file_link.upload_landing_page=true
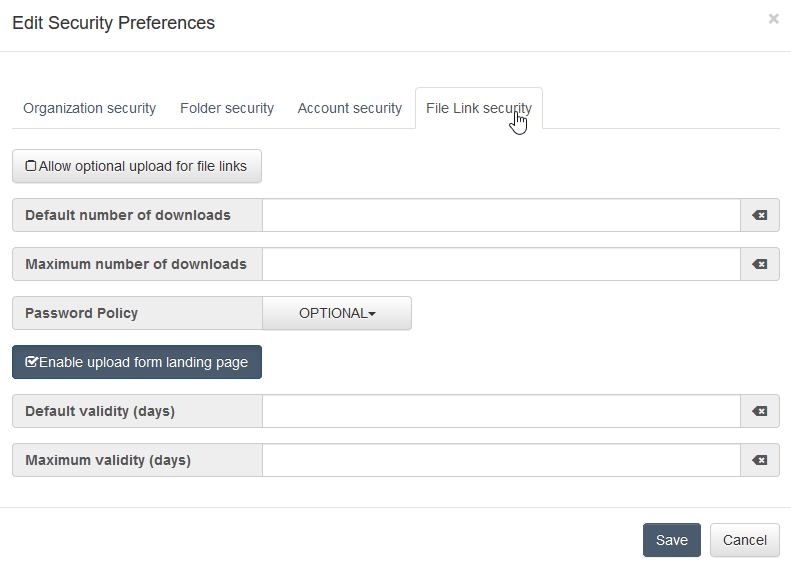
Upload form can also be activated through admin portal in the following way:
Web > Admin Portal > Preferences > Security > File Link Security > Enable Upload Form Landing Page
 In PFS v14 and v15 the upload form page can be created through the folder share button: 
After selecting the sharing button an upload form page from a folder can be created: 
The feature of upload form page is created so that user can give access to the others to upload data and this data can be accessed only by the owner of the upload form, moreover owner can provide other email addresses to receive the notification. The fields that are used in the upload form are described below for the users: 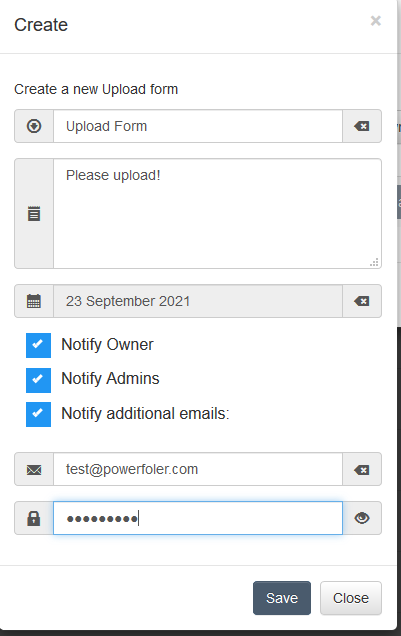
The owner of upload form page can notify more than one external users, please follow the following scheme for giving more than one email address:
Use only "Comma" between the emails and no "Space" is required. In the heading and description of an upload form only "Plain Text" is allowed as a valid input.
| Warning |
|---|
| HTML and JavaScript is not allowed in the headings and description of the upload form and they are escaped as soon as the upload form is live, also the email bodies are free from any HTML or JavaScript output due to security reasons. |
After saving the fields the upload form page is created and is shown in the share dialogue of the folder:
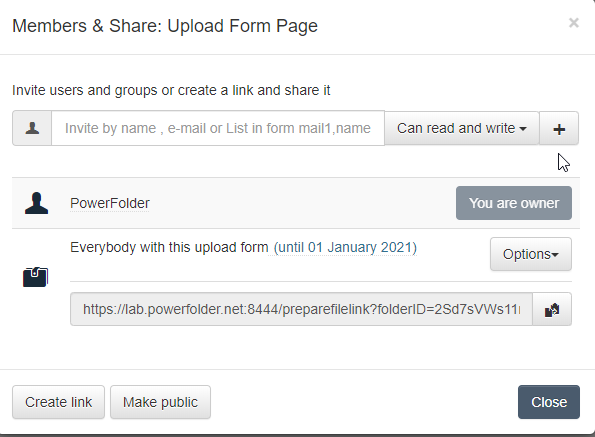
User can copy this link and provide to the other users and upload form page can be used unlimited times and can be controlled through expiry date and made safe using a password:

Owner of the upload form has now an opportunity to customize the notifications for the admins and other members of the upload form and regulate the email notifications, an example for receiving notification as upload form owner is as bellows:

Owner has an option to protect the upload form page so that the upload form is only used where it is required.
|